

Article details
Road crashes are rarely caused by a single factor. Driver behavior, vehicle condition, and road design all play a part, but design is the one factor that engineers control completely, and it affects every driver who uses the road, every day. A well-designed road makes the right action easy and the wrong action difficult, and when a mistake happens, it forgives the error instead of punishing it. This article explains the design process step by step, the main safety principles, and the treatments that reduce both the number and the severity of crashes. Examples refer to IRC (India), AASHTO, and Highway Safety Manual practice, but the approach is universal.
Core Safety Principles
Principle | Meaning |
|---|---|
Safe System approach | Humans make mistakes and are physically fragile, so roads should be designed so that mistakes do not cause death or serious injury |
Forgiving roadside | Space and treatments that let an errant vehicle recover or stop safely |
Self-explaining roads | The layout tells drivers what to expect and how to behave |
Self-enforcing roads | Geometry makes the correct speed feel natural |
Consistency | Avoid surprises such as a sharp curve after a long straight |
Separation | Separate conflicting movements by space, time, or speed |
Speed management | Impact speed decides injury severity, so design speed and operating speed should match the road's function and users |
Protect vulnerable users | Pedestrians, cyclists, and two-wheelers need their own safe space |
Why speed matters: the chance of a pedestrian dying rises sharply as impact speed goes from 30 to 50 to 70 km/h. Designing for lower speeds where people are present is one of the most effective safety measures.
Understanding Why Crashes Happen
Typical contributing factors that design can address:
Excessive or inappropriate speed
Sudden curves, poor sight distance, and sharp gradients
Conflicts at junctions and access points
Head-on collisions on undivided roads
Run-off-road crashes into trees, poles, ditches, and culverts
Pedestrian and cyclist exposure without safe crossings
Poor visibility at night, with inadequate markings, lighting, and signs
Mixed traffic (fast vehicles, slow vehicles, animals, pedestrians) in the same space
Poor drainage, causing hydroplaning and skidding
Abrupt changes in road standard
The Road Safety Design Process (Overview)
Define objectives and road function
Collect crash, traffic, and site data
Choose design speed and road category
Plan the alignment (horizontal and vertical)
Design the cross-section
Design junctions and access
Provide for vulnerable road users
Design the roadside
Provide signs, markings, lighting, and delineation
Apply road safety audits at every stage
Construct safely and manage work zones
Monitor, evaluate, and improve
Step 1 and 2 - Objectives, Function, and Data
Define the road's function
Is it a through route (mobility), a local access road, or something in between? A road trying to do both jobs becomes dangerous. A functional hierarchy (expressway, arterial, collector, local street) guides speed, access, and junction type.
Collect data
Traffic volume and composition (cars, trucks, buses, two-wheelers, non-motorized traffic)
Speed surveys
Crash records: location, type, severity, time, and weather
Land use and pedestrian activity
Topography, geology, and drainage
Existing road defects and complaints
Road user surveys and local knowledge
Identify black spots (high-crash locations) using crash frequency, rate, and severity indices, then examine their causes.
Step 3 - Design Speed and Road Category
Design speed sets the minimum standards for curves, sight distance, and gradients. It should reflect:
The road's function
Terrain (plain, rolling, hilly, steep)
Expected user mix
Adjacent land use
Common practice
Rural highways: 80 to 120 km/h for major routes, lower in hilly terrain
Urban arterials: 50 to 60 km/h
Residential and school areas: 30 km/h or lower
Do not use a high design speed on a road through a built-up area just because the land is flat. Make the road feel like what it is.
Step 4 - Alignment Design
Horizontal alignment
Avoid sharp curves following long tangents, and use gradual transitions (spiral curves)
Use curve radii at or above the minimum for the design speed
Provide superelevation (banking) and extra widening on curves as required
Maintain consistent radii in a sequence of curves
Avoid reverse curves without a transition tangent
Check sight distance around curves, clearing obstructions (trees, buildings, cut slopes)
Vertical alignment
Limit steep gradients, particularly on long descents where trucks lose brakes
Provide crest curves long enough for stopping sight distance
Provide sag curves long enough for headlight sight distance at night
Avoid hidden dips where a vehicle can disappear from view
Add climbing lanes on long upgrades and escape ramps on long downgrades where needed
Sight distances
Type | Purpose |
|---|---|
Stopping sight distance (SSD) | The distance needed to see an obstacle and stop |
Overtaking sight distance (OSD) | The distance needed to overtake safely on two-lane roads |
Intermediate sight distance | Where OSD cannot be provided, a compromise value |
Intersection sight distance | The view needed to enter or cross a road safely |
Stopping sight distance has a reaction part (reaction time of about 2.5 seconds in IRC and AASHTO practice) and a braking part. Typical stopping distances on a level road are roughly 45 m at 50 km/h, about 90 to 130 m at 80 km/h, and more at higher speeds.
Coordination
Horizontal and vertical alignments must be coordinated. For instance, a sharp horizontal curve should not begin just beyond a crest, where the driver cannot see it coming.
Step 5 - Cross-Section Design
Element | Safety role |
|---|---|
Lane width | Too narrow causes side swipes and run-offs, while very wide lanes can encourage speeding. Typical width is 3.0 to 3.75 m. |
Paved shoulders | Give space for recovery, breakdowns, and slow vehicles, and reduce run-off crashes. Often 1.5 to 2.5 m on rural highways. |
Median | Separates opposing traffic, and a major reducer of head-on crashes |
Carriageway camber and cross slope | Drains water from the surface to avoid ponding and hydroplaning |
Side drains and slopes | Provide safe, traversable slopes (preferably 1 in 4 or flatter) rather than steep drops |
Footpaths and cycle tracks | Separate vulnerable users from motor traffic |
Service roads | Separate local access from through traffic on high-speed roads |
Clear zone | An obstacle-free strip beside the road for errant vehicles |
Median treatments
Raised kerb or painted median: low-speed urban roads
Wide grassed median: rural highways
Median barrier (W-beam, cable, or concrete): high-speed or high-volume roads, to prevent crossover crashes
Wire rope barriers: effective and economical for retrofitting undivided highways, with proper maintenance
Step 6 - Junction and Access Design
Junctions are where most urban crashes and many rural crashes happen, so design them carefully.
Principles
Reduce the number of conflict points (fewer is safer)
Reduce speeds at the point of conflict
Separate movements by space or signal timing
Provide clear visibility and priority rules
Keep layouts simple and recognizable
Space junctions adequately
Common treatments
Layout | Safety features |
|---|---|
Roundabout | Low entry speeds and fewer conflict points, so typically major reductions in serious crashes versus signalized or uncontrolled crossroads. Needs correct deflection and entry angles. |
Signalized junction | Separates movements by time, suitable for higher volumes. Requires protected phases for turning traffic and pedestrians where needed. |
Priority (give way or stop) junction | Suitable for low volumes, needs good sight lines and signing |
Channelized junction with islands | Guides vehicles, shortens pedestrian crossing distance, and controls speeds |
Right-turn (or left-turn) bays | Remove waiting vehicles from through lanes, reducing rear-end crashes |
Acceleration and deceleration lanes | Let vehicles change speed off the main flow |
Grade-separated interchange | Eliminates crossing conflicts on expressways |
Staggered junctions | Replace crossroads on high-speed rural roads with two T-junctions |
Raised junction platforms | Slow vehicles and give priority to pedestrians |
Access management
Limit direct property access onto arterials and highways
Close unnecessary median openings
Provide U-turn facilities at safe locations instead of random openings
Keep access spacing consistent with design speed
Railway level crossings
Grade-separate where possible. Otherwise, provide gates, signals, good visibility, and adequate warning signs and markings.
Step 7 - Protecting Vulnerable Road Users
Pedestrians, cyclists, and motorcyclists account for a large share of road deaths in many countries, including India.
Pedestrians
Continuous, obstruction-free footpaths with proper width and kerb ramps
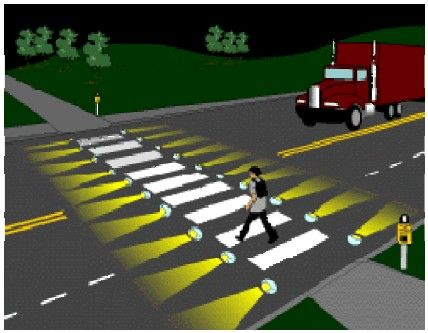
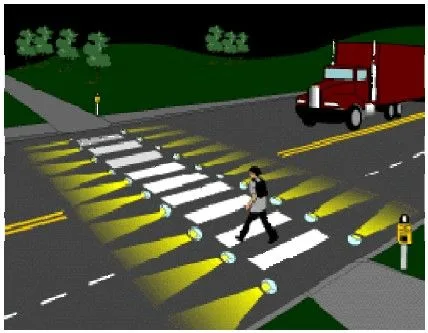
Zebra crossings, signalized crossings, and grade-separated crossings where volumes and speeds justify them
Refuge islands in medians for staged crossing
Raised crossings and speed tables at crossing points
Adequate crossing times in signals
Fencing or barriers to guide pedestrians to crossings
School zone treatments with signs, speed limits, and traffic calming
Good street lighting at crossings
Cyclists
Separate cycle tracks on busy roads
Protected junction designs
Smooth surfaces and well-maintained drainage grates
Motorcyclists
Motorcycle-friendly barriers (avoiding exposed posts), smooth surfaces, and well-maintained shoulders
Dedicated lanes in countries with high motorcycle use
Skid-resistant markings and manhole covers
Public transport users
Safe bus stops (bays outside the through lane), shelters, and crossings nearby
Traffic Calming
On roads where people and vehicles share space, physical measures hold speeds down.
Measure | Effect |
|---|---|
Speed humps and tables | Slow vehicles at crossings and residential streets |
Rumble strips | Warn drivers of upcoming hazards or lane departure |
Chicanes and lateral shifts | Force drivers to slow down |
Road narrowing and kerb extensions | Shorten crossing distance and reduce speed |
Mini roundabouts | Break up long straight sections |
Gateway treatments | Signal the transition from a rural road to a village or town |
Transverse bar markings | Create a visual illusion of speed on approaches |
Speed cameras and enforcement | Support design with compliance |
Humps and similar devices must be designed to correct dimensions, signed, marked, and lit, or they become hazards themselves.
Step 8 - Roadside Design
When vehicles leave the road, what they meet decides whether the crash is minor or fatal.
The roadside hierarchy
Remove the hazard (clear trees, poles, and boulders)
Relocate it farther from the road
Redesign it to be crashworthy (breakaway signposts, flush culvert ends)
Shield it with a barrier if it cannot be removed
Delineate it so it is visible
Clear zone width depends on speed, traffic volume, and slope. Higher speeds require wider clear zones (commonly 3 to 10 m or more in highway design guides).
Safety barriers
Type | Use |
|---|---|
W-beam guardrail | General roadside and median protection |
Thrie-beam and cable barriers | Higher containment, or wide medians |
Concrete barrier | High-volume, narrow medians |
Bridge parapets and railings | Protect against falls from structures |
Crash cushions and attenuators | Protect fixed objects such as gore areas and bridge piers |
Terminals (end treatments) | Prevent barrier ends from spearing vehicles |
Barriers themselves are hazards, so use them only where the hazard behind is worse than the barrier. Select a tested, crashworthy system for the road's speed and traffic.
Other roadside items
Breakaway or frangible poles for lights and signs
Safe culvert and drain ends
Gentle, traversable side slopes
Tree management and keeping vegetation from blocking sight lines
Fencing against animals on high-speed roads
Step 9 - Signs, Markings, Lighting, and Delineation
Signs
Follow the national code (such as IRC:67 in India or MUTCD in the USA)
Place at the correct distance, size, and height, with retroreflective sheeting
Avoid sign clutter, and keep messages clear and consistent
Warn of hazards early, such as sharp curves, junctions, school zones, and animal crossings
Pavement markings
Center lines, edge lines, lane lines, and no-overtaking lines
Stop lines, pedestrian crossings, and arrows
Retroreflective thermoplastic paint with road studs (cat's eyes) for night and wet conditions
Rumble-strip markings and transverse bars at hazard locations
Delineation
Post delineators on curves and embankments
Chevron boards on sharp bends
Object markers on obstacles and bridge approaches
Lighting
Illuminate junctions, pedestrian crossings, interchanges, bridges, and urban stretches
Provide uniform lighting with proper pole spacing, height, and glare control
Use breakaway or protected poles, and maintain luminaires
Traffic signals
Clear phasing, pedestrian signal time, and visibility from approaching lanes
Coordination to avoid long, frustrating waits that tempt red-light running
Step 10 - Road Safety Audits
A Road Safety Audit (RSA) is a formal, independent examination of a project by a trained, experienced team who were not involved in the design. It looks at the project from the road user's viewpoint, identifying hazards before they cause crashes.
Stage | What is audited |
|---|---|
Feasibility / concept | Route choice, road function, major layout options |
Preliminary design | Alignment, cross-section, junction types, interchange layouts |
Detailed design | Signs, markings, lighting, barriers, drainage, pedestrian facilities |
Pre-opening (construction complete) | Site inspection by day and night, drive-through, walk-through |
Post-opening / in-service | Existing roads, after crash data builds up |
Audit process
Brief the audit team and give them the drawings and data
Carry out the audit and site visit (by day and night)
Write an audit report listing issues by severity
The designer responds, accepting or rejecting each recommendation with reasons
Implement agreed changes and record the decisions
Road Safety Inspections (RSI) and network-wide safety reviews apply the same thinking to existing roads, ranking sections by risk.
Treating Existing High-Risk Locations
For black spots and high-risk sections:
Identify locations by crash data and risk mapping
Diagnose: study crash types, patterns, and conditions on site
Develop countermeasures linked to the crash pattern
Appraise options by cost, benefit, and effect
Implement and monitor with before-and-after studies
Crash pattern | Common countermeasures |
|---|---|
Head-on and overtaking | Median or wire rope barrier, center-line rumble strips, climbing or overtaking lanes |
Run-off-road | Clear zone, barriers, shoulder paving, edge-line rumble strips, curve delineation |
Rear-end | Turning bays, signal timing, improved skid resistance, advance warning |
Right-angle at junctions | Roundabout, signals, staggered layouts, better sight distance |
Pedestrian | Crossings with islands, raised crossings, lighting, footpaths, lower speed |
Night-time crashes | Lighting, reflective markings, delineators |
Wet-road crashes | Improved drainage, high-friction surfacing, grooving |
Speed-related | Traffic calming, gateways, enforcement, speed limits |
Animal crossings | Fencing, underpasses, warning signs |
Step 11 - Construction and Maintenance Safety
Work zones
A traffic management plan with advance warning, tapers, buffer zones, and clear detours
Barriers separating workers from traffic
High-visibility clothing and lighting for night work
Lower speed limits with enforcement
Prompt removal of temporary signs after work
Maintenance for safety
Regular inspection of surfaces, signs, markings, barriers, and lighting
Quick repair of potholes, edge drop-offs, and ponding
Skid resistance monitoring and surface renewal
Vegetation control to keep sight lines clear
Cleaning drains and culverts before the rains
Replacing faded markings, damaged signs, and damaged barriers
Quick removal of debris and spilled material
Step 12 - Monitoring and Evaluation
Collect crash data before and after every safety treatment
Use safety performance indicators: operating speeds, helmet and seat belt use, red-light compliance, and conflict studies
Compare actual to expected crashes, using methods such as empirical Bayes
Review lessons learned and update the design standards
Share results with the wider engineering community
Evaluating Treatments Economically
Safety measures should be prioritized by cost-effectiveness.
Benefit-cost ratio (BCR) = value of crashes prevented ÷ cost of the treatment
Crash reduction factors (CRFs) from research give the expected percentage reduction for a given treatment
Cheap measures such as signs, markings, delineators, and rumble strips often have high BCRs
High-cost measures such as grade separation are justified where traffic volumes and crash costs are high
Prioritize the sites and measures that save the most lives and serious injuries per rupee or dollar spent.
Common Design Mistakes
Treating design speed as a minimum to be exceeded, rather than designing for the intended operating speed
Building wide, straight roads through villages with no calming
Ignoring pedestrians and two-wheelers in design and junction layout
Leaving rigid objects in the clear zone
Using barriers without proper terminals or at wrong heights and offsets
Placing access points too close to junctions
Poor drainage, leading to ponding and skidding
Allowing encroachment and roadside commercial activity to spill onto the carriageway
Inconsistent geometry, such as sudden narrowing or surprise curves
Skipping safety audits to save time
No maintenance budget for markings, signs, and barriers
Failing to monitor whether the treatment worked