

Article details
Quality control (QC) and monitoring guarantee that the end product corresponds to the drawings and specifications, follows the codes, and meets customer expectations. The impact of poor quality leads to rework, delays, extra costs, safety problems, and controversial situations. The process of good quality management starts from day one and is managed through the entire process until handover.
This article looks at the ideas and the methods and the practices concerning monitoring of quality at different stages.
Quality Planning (QP)
Formulating rules, methods, duties, and means prior to the commencement of work
Quality Assurance (QA)
Preemptive measures aimed at giving an assurance that requirements will be fulfilled (methods/audits/courses)
Quality Control (QC)
Testing work and materials to uncover defects
Monitoring
Consistent observation of progress, quality, cost, and safety versus the plan
Corrective action
Correction of the detected defect and its root cause
Preventive action
Revision of the procedures in such a way that the anomaly does not appear again
The Quality Management Cycle (PDCA)
Plan: set quality objectives, standards, and inspection points.
Do: execute the work using approved methods and materials.
Check: inspect, test, measure, and audit.
Act: correct defects, update procedures, and improve.
This cycle repeats for every activity, such as excavation, reinforcement, concreting, and masonry.
Stage 1: Quality Planning (Pre-Construction)
Documents prepared
Project Quality Plan (PQP): the master document defining the quality system, roles, standards, and procedures
Inspection and Test Plan (ITP): lists each activity, what is checked, the method, the acceptance criteria, the frequency, and who inspects or approves
Method statements: step-by-step procedures for key activities
Material approval submittals: samples, test certificates, and data sheets
Quality checklists for each activity
Quality organization chart: QA/QC manager, engineers, inspectors, and their authority
Hold point Work should not proceed until the approval is received from inspector or client (for example, prior to laying concrete).
Witness point Should the client or consultant be informed, it is noted as a witness point but work may continue if the client does not attend.
Review point The documents are looked at.
Surveillance Occasional checks.
Standards and codes
The applicable codes (for example IS codes, ASTM, BS, or Eurocodes) and project specifications are listed so that acceptance limits are clear.
Stage 2: Material Quality Control
Materials are checked before they reach the work.
Approval and receiving
Source approval and sample testing
Manufacturer test certificates
Inspection on delivery: quantity, condition, brand, grade, batch, and expiry
Rejected material is tagged and removed from site
Proper storage: cement off the ground and dry, steel protected from rust, aggregates separated
Typical tests
Material | Tests |
|---|---|
Cement | Fineness, setting time, soundness, compressive strength |
Aggregates | Sieve analysis, specific gravity, water absorption, impact and crushing value, silt content |
Sand | Grading, silt content, bulking |
Reinforcement steel | Tensile strength, yield strength, elongation, bend and rebend, weight per meter |
Bricks and blocks | Compressive strength, water absorption, dimensions |
Water | pH, chlorides, sulfates, suspended solids |
Admixtures | Compatibility and performance data |
Tiles and finishes | Dimensions, water absorption, slip resistance, shade consistency |
Pipes and fittings | Pressure rating, dimensions, certification |
Stage 3: Quality Control of Construction Activities
Survey and layout
Verify benchmark, grid lines, and levels
Check diagonals, offsets, and setbacks
Record and approve before excavation
Earthwork and excavation
Check dimensions, depth, and bottom level
Verify founding stratum against the geotechnical report
Compaction testing: Proctor and field density (commonly 95 to 98 percent)
Dewatering and slope or shoring checks
Foundation and concrete work
Before concreting (hold point checks)
Excavation level and cleanliness, and the PCC layer
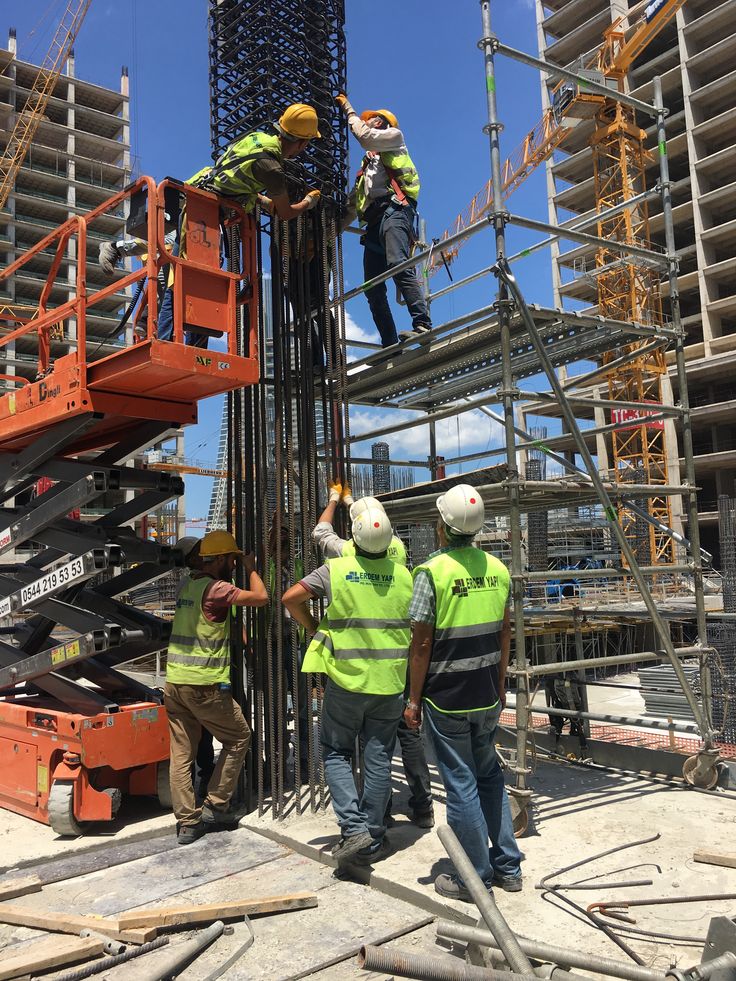
Reinforcement: bar diameter, spacing, laps, cover blocks, anchorage, bending shapes
Formwork: alignment, dimensions, rigidity, tightness, oiling or release agent
Embedded items: sleeves, conduits, inserts
Concrete pour card approval
During concreting
Verify the concrete mix design and delivery ticket
Slump or flow test on each truck or batch
Temperature measurement in hot or cold weather
Cube sampling: commonly a set of cubes for each batch volume per code, tested at 7 and 28 days
Check placement, compaction (vibrators), height of drop, and segregation
Maintain pour records: time, volume, location, and weather
After concreting
Curing: wet curing, ponding, curing compound, or wrapping for the specified period (commonly at least 7 days for ordinary cement)
Formwork removal only after the minimum strike period or strength
Visual inspection for honeycombing, cracks, and surface defects
Non-destructive testing where needed: rebound hammer, ultrasonic pulse velocity, core tests
Acceptance based on cube results and code criteria
Reinforcement and steel structures
Welding inspection, bolt torque, and joint checks
Non-destructive testing of welds: dye penetrant, magnetic particle, ultrasonic, or radiography
Paint and corrosion protection thickness
Alignment and verticality checks (plumb and level) during erection
Masonry and plastering
Block or brick grade, mortar mix, and joint thickness
Alignment, plumb, level, and bonding with columns
Curing of masonry and plaster
Plaster thickness, flatness (straight-edge test), and absence of hollow sounds
Waterproofing
Surface preparation and primer
Membrane thickness, overlaps, and detailing at corners and drains
Flood or ponding test (commonly 24 to 72 hours) before covering with screed or tiles
MEP works
Electrical: conduit routing, wire sizing, insulation resistance (megger) test, earth resistance test, circuit continuity, and load testing
Plumbing: hydrostatic or pressure test of supply lines, leak tests, drain slope, and flow tests
HVAC: duct leakage test, air balancing, and equipment commissioning
Fire systems: sprinkler hydro test, alarm system function test, and hydrant flow test
Finishing works
Flooring: level, slope, hollow sound test, joint alignment, and shade matching
Painting: surface preparation, number of coats, coverage, and uniformity
Doors, windows, and joinery: alignment, operation, sealing, and hardware
Mock-up approvals for facades, toilets, and typical rooms before bulk work
Stage 4: Inspection Process Flow
A typical workflow for each activity:
Contractor completes the activity and the site engineer self-inspects using a checklist.
Request for Inspection (RFI) is raised to the consultant or client.
Inspection is carried out against drawings, specifications, and the ITP.
Outcome:
Approved: work proceeds
Approved with comments: minor items fixed without a stop
Rejected: rectify and re-inspect
Records are signed and filed.
Stage 5: Non-Conformance Management
When work or material does not meet requirements:
Identify and record the issue in a Non-Conformance Report (NCR), with location, description, photos, and the clause breached.
Contain the problem by stopping related work and isolating suspect material.
Root cause analysis: methods such as the 5 Whys or a fishbone (Ishikawa) diagram.
Decide disposition: accept as is (with engineer approval), repair, rework, or reject and replace.
Corrective and preventive actions are implemented.
Verification and closure by the QC or consultant.
Track NCRs in a register, and review trends monthly.
Stage 6: Monitoring Progress, Quality, and Performance
Monitoring is the control side of project management. It compares actual performance against the plan and triggers action.
What is monitored
Area | Methods and indicators |
|---|---|
Schedule | Baseline vs actual progress, critical path updates, S-curves, look-ahead schedules, delay analysis |
Cost | Budget vs actual, cash flow, cost to complete, variation orders |
Quality | Inspection pass rate, NCR count and closure time, test results, rework percentage |
Safety | Incident rate, near misses, audits, toolbox talks, permit compliance |
Productivity | Output per crew, equipment utilization, material wastage |
Documents | RFIs, submittals, approvals, drawing revisions |
Monitoring tools
Daily and weekly progress reports with photographs
Site diaries recording weather, labor, equipment, and events
Weekly coordination and monthly review meetings
Planning software such as Primavera P6 or MS Project
BIM and 4D/5D models linking schedule and cost to the model
Project management platforms such as Procore or similar systems for RFIs, snag lists, and approvals
Site technology: drones for progress surveys, laser scanning to check as-built geometry, and IoT sensors for concrete temperature and maturity
Earned Value Management (EVM): compares planned value, earned value, and actual cost to measure schedule and cost performance (SPI and CPI)
Key performance indicators (KPIs)
Schedule Performance Index (SPI) = Earned Value / Planned Value
Cost Performance Index (CPI) = Earned Value / Actual Cost
Rework cost as a percentage of the contract value
First-time pass rate of inspections
NCR closure time
Number of open snags at handover
An SPI or CPI below 1 signals trouble and calls for corrective action.
Stage 7: Audits and Reviews
Internal quality audits check that site practice follows the quality plan
Third-party and client audits provide independent assurance
Supplier and subcontractor audits
Management reviews examine trends and decide on improvements
Findings are logged, assigned, and closed with evidence.
Stage 8: Testing, Commissioning, and Handover Quality
Individual system testing, followed by integrated system testing
Commissioning with witnessed performance tests
Snagging: detailed walk-through to build a defect list, followed by rectification and re-inspection
Documentation handover:
As-built drawings
Test certificates and inspection records
Material approvals and warranties
O&M manuals
NCR closure records
Completion certification from authorities
Stage 9: Post-Handover
Defects liability period (commonly 6 to 12 months), with tracking of defect reports and response times
Warranty claims management
Post-occupancy feedback
Lessons learned review fed into the next project's quality plan
Documentation and Records
Quality is only provable with records. Keep:
Inspection and test plans and completed checklists
Material test reports and approvals
Concrete pour records and cube results
Survey and level records
NCR register and closure reports
Calibration certificates for testing and measuring equipment
Photographs, with date and location
Meeting minutes and correspondence
Good records protect all parties in disputes and warranty claims.
Roles and Responsibilities
Role | Responsibility |
|---|---|
Project manager | Overall delivery and quality culture |
QA/QC manager | Quality system, audits, NCR control |
Site and discipline engineers | Day-to-day workmanship and self-inspection |
QC inspectors and lab technicians | Testing, sampling, inspection |
Supervisors and foremen | Ensure crews follow procedures |
Client and consultant | Review, witness, and approve |
Subcontractors and suppliers | Deliver to specification and provide documentation |
All workers | Follow instructions and report issues |
Common Quality Problems and Prevention
Problem | Likely cause | Prevention |
|---|---|---|
Honeycombing in concrete | Poor compaction, congested bars, low slump | Proper vibration, workable mix, bar spacing check |
Cracking | Early drying, poor curing, settlement | Good curing, joints, soil control |
Low cube strength | Wrong mix, excess water, bad sampling or curing | Batch control, slump test, correct cube handling |
Misaligned columns | Layout error, formwork movement | Verification, rigid formwork, plumb checks |
Water leakage | Faulty waterproofing or poor detailing | Flood test, supervision at joints |
Hollow tiles | Poor bedding, weak adhesive | Full bedding, tap testing |
Rework and delays | Missed inspections, unclear drawings | ITPs, RFIs, early coordination |