

Article details
Grouting is the injection of a fluid material (grout) into soil, rock, or voids, where it sets and hardens. It does three jobs: it fills voids, it binds loose particles so the ground becomes stronger and stiffer, and it blocks water paths so seepage drops. The result is ground that carries more load, settles less, and leaks less.
Why Weak Ground Needs Grouting
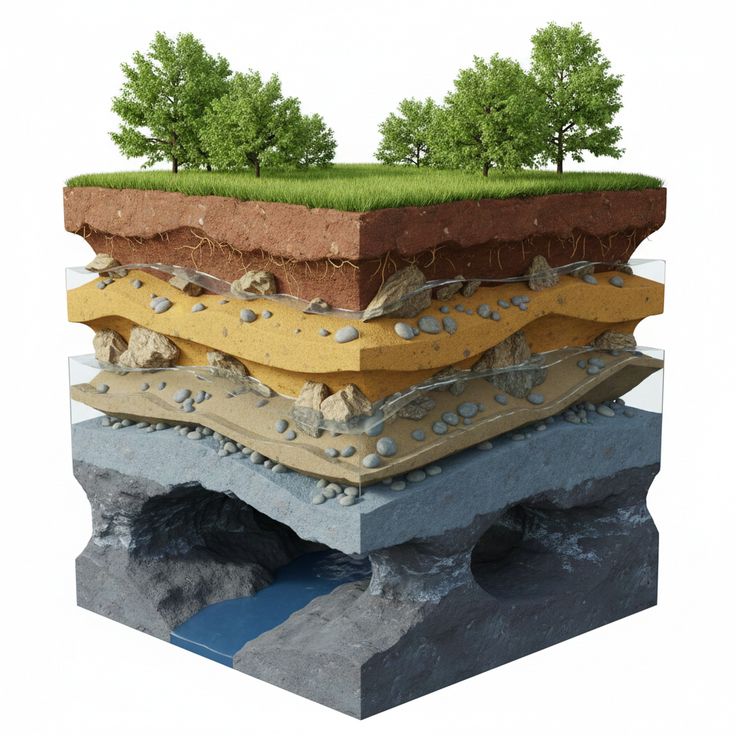
Soil is a skeleton of particles with empty spaces (voids) between them. Weakness usually comes from:
Loose granular soils with high void ratio and little cohesion
Soft clays with low shear strength and high compressibility
Voids and cavities from karst, mining, washed-out fines, or leaking pipes
Fractured or weathered rock with open joints
High permeability, which lets water flow and carry fines away (piping)
Fill and made ground with uneven density
Grouting treats these problems in place, without removing and replacing the ground.
How Grout Fills Voids and Strengthens Soil
The mechanism depends on the method, but there are four main actions:
Action | What happens | Result |
|---|---|---|
Void filling | Grout flows into cavities, joints, and pore spaces and sets | Removes empty space, stops further collapse |
Cementing (binding) | Grout coats particles and bonds them at contact points | Adds cohesion, raises strength and stiffness |
Densification | Thick grout is pushed in under pressure and displaces and compacts the surrounding soil | Increases soil density and confinement |
Permeability reduction | Hardened grout blocks flow paths | Cuts seepage and prevents internal erosion |
Main Grouting Methods
1. Permeation (Penetration) Grouting
Low-viscosity grout flows into the pores of the soil without changing its structure. It works best in clean sands and gravels, and in fractured rock.
Fills pore spaces and bonds particles into a sandstone-like mass
Needs grout particles smaller than the pore openings, so fine grouts (microfine cement, chemical grouts) are used for finer soils
Common for water cut-offs and excavation support in granular soils
2. Compaction Grouting
A very stiff, low-slump grout (like damp mortar) is pumped to form a growing bulb that pushes soil outward.
Does not penetrate the soil, it displaces and densifies it
Good for loose sands, silts, and fills, and for lifting settled structures
Bulbs are built from the bottom up in stages
Heave and pressure must be monitored to avoid damaging nearby structures
3. Fracture (Hydrofracture) Grouting
Grout is injected at pressures high enough to split the soil, forming sheets and lenses.
Used in clays and fine soils where permeation is impossible
Compresses the surrounding soil and can lift structures (compensation grouting under tunnels and buildings)
Needs careful pressure control and real-time monitoring
4. Jet Grouting
A high-pressure jet of grout (often with air or water) cuts and mixes the soil as the rod is rotated and lifted, forming a column or panel of soilcrete.
Works in almost all soil types, from clay to gravel
Creates columns, overlapping walls, and bottom plugs
Strength depends on soil type and grout mix
Used for underpinning, excavation support, and cut-off walls
5. Cement and Chemical Mixing (Deep Soil Mixing, Brief)
Not strictly injection, but related: binder is mechanically mixed with soil to form stabilized columns.
6. Cavity and Void Filling (Gap Grouting)
Flowable cement grout, often with sand or fly ash, fills large voids such as old mine workings, sinkholes, pipes, and gaps behind tunnel linings or under slabs.
7. Rock Grouting
Grout is injected into drilled holes to seal joints and fissures, as in dam foundations (curtain grouting) and to strengthen rock around tunnels (consolidation grouting).
Types of Grout
Grout type | Features | Typical use |
|---|---|---|
Cement grout (neat or with additives) | Cheap, strong, durable; particles limit penetration into fine soil | Rock, coarse soils, voids |
Microfine cement | Very fine particles, penetrates finer sand | Permeation in fine sand and fractured rock |
Cement-bentonite | Stable, resists bleeding, low strength | Cut-off walls, seepage control |
Sand-cement or mortar | Thick, low mobility | Compaction grouting, large voids |
Fly ash or slag grouts | Cheaper, durable, better flow | Mine and cavity filling |
Sodium silicate (chemical) | Low viscosity, controllable set time | Permeation in sands, water control |
Polyurethane | Expands, reacts with water, flexible | Stopping active leaks, sealing cracks |
Acrylate and epoxy | Very low viscosity, specialized | Fine cracks, precise sealing |
Lime and other stabilizers | Reacts with clay minerals | Clay stabilization |
Key grout properties: viscosity, particle size, bleed, set time, strength, and durability. Chemical grouts must be chosen with environmental and groundwater protection in mind.
The Grouting Process Step by Step
Investigate the ground. Boreholes, soil grading, permeability tests, and groundwater data show what the grout must do.
Set the objective. Is the goal strength, settlement control, void filling, or water cut-off? The target decides method and grout.
Design the pattern. Select hole spacing, depth, grout mix, injection pressure, and volume per hole.
Trial the grout. Test mixes in the lab and, for important work, in a field trial.
Drill the holes. Use drilling methods suited to the soil, with casing where the hole may collapse.
Mix the grout. Use a colloidal mixer for consistency, controlling water-cement ratio and additives.
Inject in stages. Work in sequence, commonly primary, secondary, and tertiary holes, so later holes check and complete earlier work.
Control pressure and volume. Record flow, pressure, and volume continuously, and stop at refusal criteria.
Monitor. Watch ground and structure movement, heave, and groundwater.
Verify. Coring, permeability tests, load tests, geophysics, and settlement readings confirm performance.
Pressure, Volume, and Control
Pressure must be high enough to push grout into the ground, but low enough not to damage it.
Too much pressure can cause uncontrolled fracturing, heave, grout leakage to the surface, or damage to nearby foundations and utilities.
Too little leaves voids unfilled.
Typical practice: pressure is set by depth and soil, with gradual increases and limits on both pressure and volume per stage.
Real-time monitoring (pressure, flow rate, volume) plots help detect fracturing and leaks.
Stage grouting limits how much ground is treated per injection, improving control.
Applications
Application | What grouting does |
|---|---|
Foundation improvement | Increases bearing capacity and reduces settlement of weak layers |
Underpinning | Strengthens ground beneath existing footings |
Dam and cofferdam cut-offs | Seals fractures and permeable layers to cut seepage |
Tunnels and shafts | Pre-treats ground ahead of excavation, fills voids behind linings |
Excavation support | Forms water-tight, stiff soil masses and bottom plugs |
Sinkhole and mine void repair | Fills cavities and prevents collapse |
Slab and pavement lifting | Fills voids and lifts settled slabs |
Liquefaction mitigation | Densifies or cements loose, saturated sands |
Pipe and utility sealing | Fills annular gaps and stops leaks |
Structural repairs | Injects cracks and fills voids in concrete and masonry |
Quality Control and Verification
Mix control: density, viscosity (flow cone), bleed, and set time tests on grout
Cube or cylinder strength tests on grout samples
Injection records: pressure, flow, volume, hole location, and stage
Hole sequencing that proves closure (later holes should take less grout)
Coring and in-situ tests in treated ground
Permeability (Lugeon or packer) tests for rock and cut-offs
Geophysical surveys and load or plate tests
Monitoring of settlement, heave, and groundwater
Acceptance criteria should be set before work starts, such as target permeability, strength, or settlement.
Advantages and Limitations
Advantages | Limitations |
|---|---|
Treats ground in place with minimal excavation | Hard to see where grout actually went |
Works under existing structures and in confined spaces | Results vary with soil heterogeneity |
Improves strength, stiffness, and water-tightness | Fine soils resist permeation |
Can be targeted to specific layers | Risk of heave and ground fracture if poorly controlled |
Fast and flexible, from small repairs to major works | Chemical grouts raise environmental concerns |
Can be adjusted during work based on monitoring | Needs skilled crews and good records |
Common Problems and Their Causes
Problem | Likely cause |
|---|---|
Grout will not take (refusal) | Soil too fine for the grout, or pressure too low |
Surface leaks or heave | Pressure too high, shallow injection, hydrofracture |
Grout travels too far | Mix too thin, flows into voids, or unexpected channels |
Low strength | Excess water, bleed, contamination, or poor mixing |
Incomplete treatment | Wrong spacing, poor sequencing, or hidden zones |
Damage to nearby structures | Uncontrolled pressure or volume |
Washout before set | Flowing groundwater with slow-setting grout |
Good Practice
Match the method and grout to the soil: permeation for clean sand, compaction for loose fill, fracture for clay, jet for varied ground
Run trial areas on critical jobs
Use primary-secondary-tertiary sequencing
Set and respect pressure and volume limits
Monitor the ground and nearby structures during injection
Keep complete records of every hole and stage
Protect groundwater when using chemical grouts
Verify results with testing, not assumption
Conclusion
Grouting works because it changes the ground from the inside. By filling voids, binding particles, compacting loose soil, and plugging water paths, it turns weak or leaky layers into ground that can carry load and hold water out. The skill lies in matching method to soil, controlling pressure and volume, and verifying the result, since the work happens out of sight. Values and practices here are general, so design and specification should follow site investigation and the relevant standards, with a geotechnical engineer overseeing critical projects.