<link href="https://fonts.googleapis.com/css2?family=Caveat:wght@500;700&family=JetBrains+Mono:wght@400;500;600&display=swap" rel="stylesheet" /> Skip to main contentEngineering Courses, Mentoring & Jobs | EveryEng
Nut And Bolt Design in Fusion 360 banner
Preview this course

Nut And Bolt Design in Fusion 360

Nut And Bolt Design in Fusion 360 banner
Preview this course
Self-paced Beginner

Nut And Bolt Design in Fusion 360

4(1581)
1 enrolled
1247 views
₹ 99
10 min
Anytime
English
1247 views
Team EveryEng
Team EveryEngMechanical Engineering
  • 7-day money-back guarantee
  • Lifetime access
  • Certificate of completion
Volume pricing for groups of 5+

Why enroll

People enroll in the Nut and Bolt Design in Fusion 360 course because it builds a strong, practical foundation in real-world mechanical design. Fasteners are used in almost every product, and learning how to design them correctly helps students understand industry standards, threading systems, tolerances, and parametric modeling.

What enrolled engineers say

2 verified reviews
  • Feb 25, 2026

    Coming into this course, I had some prior exposure to the subject, mostly from specifying fasteners rather than modeling them. The focus on building nuts and bolts parametrically in Fusion 360 filled a gap I’ve seen both in automotive bracket design and aerospace secondary structure work, where CAD models often gloss over thread accuracy. Walking through thread standards and tolerances was useful, especially when comparing cosmetic threads versus modeled threads and the downstream impact on mass properties and interference checks at the system level. One challenge was managing edge cases around thread start depth and chamfers; a small mismatch there can cause assembly issues when you drop these parts into larger assemblies. That’s something I’ve run into in industry, particularly when designs move from prototype to supplier-ready drawings. The course handled this reasonably well, though a bit more emphasis on inspection tolerances would help. A practical takeaway was learning how to set up parameters so a single bolt model can scale across sizes without breaking features, which aligns better with how automotive platforms reuse hardware families. Compared to common industry shortcuts, this approach is more disciplined and easier to maintain long-term. I can see this being useful in long-term project work.

    RAJA G. Verified
  • Feb 25, 2026

    Coming into this course, I had some prior exposure to the subject, mostly from using off‑the‑shelf fasteners in automotive assemblies. What was missing was a clean way to actually model them properly in Fusion 360 instead of dropping in placeholders. The walkthrough on parametric thread creation and dimension control helped close that gap. From an engineering standpoint, the discussion around tolerances and thread standards was useful. In automotive work, small changes in bolt length or head clearance can mess with torque specs, and the course showed how to control that directly in the model. The same thinking applies to aerospace-style fastener standards, where consistency and fit really matter even at a basic level. One challenge was getting comfortable with Fusion 360’s thread tool versus fully modeled threads, especially when thinking about 3D printing versus manufacturing. It took a bit of trial and error to avoid overcomplicating the design. A practical takeaway was setting up nuts and bolts so they can be quickly resized without breaking assemblies. That’s already saving time on a small fixture design at work. It definitely strengthened my technical clarity.

    Team E. · Engineer Verified

Is this course for you?

You should take this if

  • You work in Aerospace or Automotive
  • You're a Mechanical Engineering professional
  • You prefer self-paced learning you can revisit

You should skip if

  • You need a different specialisation outside Mechanical Engineering
  • You need live interaction with an instructor

Course details

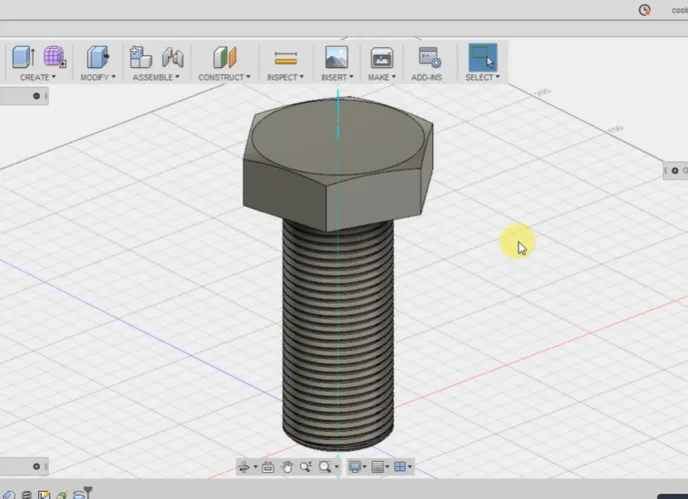
Nut and Bolt Design in Fusion 360 is a practical, hands-on course focused on creating accurate, standards-based fasteners using AutoDesk Fusion 360. Learners will explore thread types, dimensions, and tolerances while modelling nuts and bolts from scratch using parametric design tools. The course covers sketching, revolved and extruded features, thread creation, and best practices for realistic and manufacturer designs. By the end, participants will be able to confidently design customisation nuts and bolts, apply them in assemblies, and prepare models suitable for 3D printing or manufacturing.

Course suitable for

Key topics covered

  • Introduction to nuts, bolts, and fastening standards

  • Thread types, sizes, and tolerances

  • Parametric sketching and modeling in Fusion 360

  • Creating external and internal threads

  • Designing hex and custom nut and bolt heads

  • Using revolve, extrude, and pattern features

  • Applying threads using Fusion 360 tools

  • Assembling nuts and bolts correctly

  • Preparing designs for manufacturing and 3D printing

Course content

The course is readily available, allowing learners to start and complete it at their own pace.

2 lectures10 min
  1. Bolt Design external thread in Fusion 360
    5 min
  2. Nut Design Internal thread in Fusion 360
    5 min

Opportunities that await you!

Skills & tools you'll gain

Autodesk

Career opportunities

Where this fits — what comes before, what comes next

₹99

Access anytime

Questions and Answers

A: The correct choice keeps shear out of the threads by maintaining friction through preload. B drops preload and invites slip under variable load. C assumes threads are a shear feature, which they aren't. D trades bearing area for packaging and raises local stress at the countersink.

A: The requirement protects preload integrity by keeping tightening in the elastic range. B confuses failure philosophy with material control. C mixes standards without sharing the same basis. D invents a linkage between strength class and modulus that doesn't exist.

A: That torque lands the preload in the elastic window with friction included. B underloads by using the wrong stress basis. C ignores the 70% limit and risks yield. D assumes friction disappears, which it never does in steel-on-steel joints.

A: Larger clearance reduces joint stiffness and friction reserve. B mixes bearing stress with axial load. C mistakes freedom of movement for strength. D ignores how tolerance stack-ups amplify preload scatter.