Skip to main contentEngineering Courses, Mentoring & Jobs | EveryEng
Fabrication Technology banner

Fabrication Technology

Fabrication Technology banner
Live online Beginner

Fabrication Technology

4(53)
374 views
COMPLETED

Tell us and we’ll notify you when the next batch is scheduled.

2 hrs
-
English
374 views
Chaitanya Purohit
Chaitanya PurohitConsultant
  • 7-day money-back guarantee
  • Session recordings included
  • Certificate of completion

Why enroll

Participants join this course to gain practical knowledge of modern fabrication techniques and industry best practices that enhance their technical skills and job performance. It helps professionals understand advanced tools, materials, and quality control methods required for producing reliable and high-quality components. The course also supports career growth by improving competency in fabrication processes, making participants more valuable in manufacturing and engineering roles.

Is this course for you?

You should take this if

  • You work in Aerospace or Automotive
  • You're a Mechanical Engineering / Metallurgy & Material Science professional
  • You prefer live, instructor-led training with Q&A

You should skip if

  • You need a different specialisation outside Mechanical Engineering
  • You need fully self-paced, on-demand content

Course details

This course offers an in-depth exploration of fabrication technology, focusing on the principles, techniques, and best practices involved in the fabrication of metal components and structures. It is designed for professionals involved in the manufacturing, construction, and engineering sectors who need a thorough understanding of the latest fabrication technologies and methodologies. Participants will learn about various fabrication processes, equipment, materials, and quality control practices essential for producing high-quality, durable components.

Course suitable for

Key topics covered

  • Introduction to Fabrication Technology

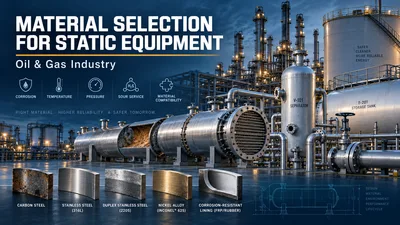
  • Materials Selection for Fabrication

  • Fabrication Processes and Techniques

  • Cutting Techniques:

  • Welding Processes:

  • Forming Processes:

  • Machining Processes:

  • Assembly Techniques:

  • Advanced Fabrication Technologies

  • CNC Machining:

  • Additive Manufacturing (3D Printing):

  • Robotic Welding and Automation:

  • Quality Control in Fabrication

  • Safety in Fabrication

  • Cost-Effective Fabrication Practices

  • Sustainability in Fabrication

  • Industry Standards and Codes

  • Trends and Innovations in Fabrication Technology

Opportunities that await you!

Career opportunities

Training details

This is a live course that has a scheduled start date.

Why people choose EveryEng

Industry-aligned courses, expert training, hands-on learning, recognized certifications, and job opportunities-all in a flexible and supportive environment.

What learners say about this course

Yogendra Sagar Mishra
May 3, 2026

Labs assume you’ve already got a note-taking setup; lost a few minutes wrangling that. After that, the exercises forced me to face some sloppy habits, especially jumping to solutions before framing the problem. The Constraint Ladder in Week 3 stuck with me; writing the first arch sketch, then deleting half of it, felt like a PR review in slow motion. Useful tie-ins to day job stuff—how this shows up in prod incidents, or when a CI failure sends you chasing noise. It’s beginner-level, but not fluffy. Short videos, lots of doing. I’ve already changed how I size tasks and decide what actually needs attention vs. what can wait.

vineeth nair
vineeth nair
May 3, 2026

The no‑frills handling of the tougher concepts helped keep things moving without fluff. As a TeamLead, I’m thinking about how this lands with juniors, and the section on FFT windowing where they contrast Hanning vs rectangular using a 30 RPS pump trace stuck; seeing leakage in the spectrum made the tradeoff click. The bearing fault frequency example (BPFO vs BPFI) tied back to obs in prod equipment, which matters if you’re supporting oilgas or basic automotive NVH. it's mostly pitched right for beginner, though I wasn’t sold on how quickly sensor mounting was brushed past; a bit more on stud vs magnet effects would help teams avoid bad data. I’ve already pointed one engineer to the ISO 10816 chart walkthrough when reviewing a PR on alarm thresholds. This ended up being the baseline reference I’ve been missing the last couple years—useful between meetings, not academic.

Yogendra Sagar Mishra
May 3, 2026

Sat through plenty of intro courses; this one actually has teeth. The Module 2 walkthrough on cold vs hot commissioning—especially the FAT/SAT handoff and interlock verification before first power-on—stuck, because it mapped cleanly to prod cutover with obs checks tied back to the infra arch. Some pacing felt rushed, and I wasn't sold on the quiz gating, but the checklists translate straight to a repo PR or runbook. Walking away with fewer open questions and answers I'm more confident shipping.

Avatar icon
Charu Humane
May 3, 2026

Short, practical reps—like the Chapter 2 'Status Update Rewrite' where you cut a rambling Slack into a 5-bullet PR summary, kept it useful between meetings. It's beginner-level, mostly, but I've already used the 'ask-back' checklist in a prod incident review; wished there was more on async comms across infra/k8s teams.

COMPLETED

-

Questions and Answers

A: A works because acceptance starts with what’s physically there: size and continuity against the drawing before you stress it. B feels disciplined, but UT on a small fillet without confirming nominal size is chasing precision before relevance. C mimics structural test logic, yet proof loading before basic dimensional acceptance is backwards and risky. D leans on paperwork faith; without a weld map or datasheets, that assumption is exactly how undersized welds sneak through.

A: A follows the chain: 220×24 ≈ 5.3 kW, divided by 5 mm/s gives about 1 kJ/mm before efficiency factors. B ignores arc efficiency and jumps a decade high. C remembers efficiency but overcorrects by an order, confusing percentage loss with total scale. D drags in furnace intuition, which operates on entirely different time and mass scales.

A: A matches the symptom directionality: last-pass bias points to sequence-driven residual stress. B sounds metallurgical, but galvanic effects don’t drive macroscopic bowing. C would hit strength and hardness more than geometry. D explains movement after unclamping, yet the distortion appearing post–stress relief, not immediately, breaks that line of reasoning.

A: A directly measures flatness with the tools at hand and ties to the GD&T intent. B confuses parallelism and thickness with flatness. C mixes functional testing with acceptance, masking a geometric nonconformance. D trusts process capability without evidence, a gap DFMEA flags immediately.