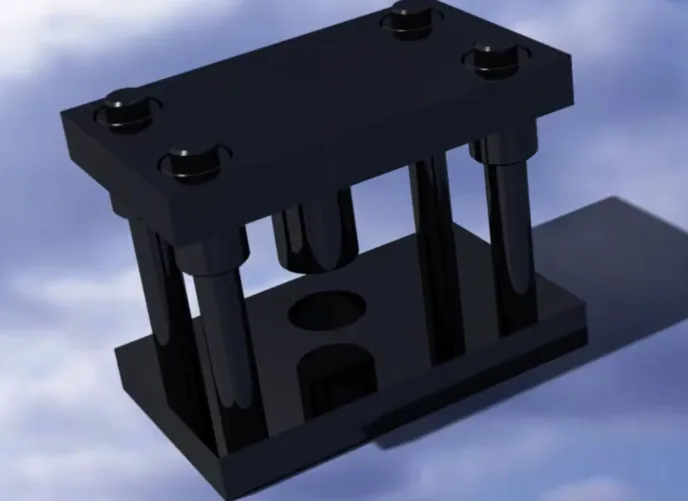
Press Tool Design In CATIA (Assembly & Part Modelling)
Press Tool Design In CATIA (Assembly & Part Modelling)

- Lifetime access
- Certificate of completion
- Foundational Learning
- Access to Study Materials
Why enroll
What enrolled engineers say
At first glance, the topics looked familiar, but the depth surprised me. Coming from an automotive background where press tools drive most body-in-white stamping, this course helped tighten gaps around how those tools are actually built in CATIA, not just interpreted from supplier data. The breakdown of punch, die, stripper, and guide components in the Assembly workbench connected well with real shop-floor practices I’ve seen on door inner panels and brackets. One challenge was keeping the parametric relationships clean while switching between Part Modelling and Assembly. A couple of my early models broke when I updated stock thickness, which forced me to rethink how I was constraining sketches and using publications. That struggle was useful, though, because aerospace-style sheet metal tooling also demands that level of robustness when tolerances stack up. A practical takeaway was learning a repeatable method for die set layout and clearance definition that I could immediately apply to an ongoing automotive supplier review. It filled a knowledge gap between CAD modeling and actual manufacturability discussions. Overall, it felt grounded in real engineering practice.
Coming into this course, I had some prior exposure to the subject, mostly from working around automotive body panel tooling, but the actual press tool design side was a gap. This course helped connect CAD modeling in CATIA with how tools are actually built and used on the shop floor. The breakdown of punch, die, stripper, and die set assemblies was especially useful, and seeing how clearances are handled for stamping and blanking made things click. One challenge was keeping track of constraints and relationships in CATIA assemblies; a small mistake there can throw off the whole tool. Spending time fixing misaligned components was frustrating at first, but it reflected real project issues I’ve seen in automotive tooling programs. The material discussions also tied well into aerospace-style sheet metal considerations, like accuracy and repeatability, even at a beginner level. A practical takeaway was learning a structured workflow for part modeling before jumping into assemblies, which already helped on a small internal fixture concept at work. The content felt aligned with practical engineering demands.
Coming into this course, I had some prior exposure to the subject from shop-floor support work, but press tool design in CATIA was still a gap. Most past projects leaned on legacy drawings, especially for automotive body-in-white stamping parts, so building tools from scratch was new. The course walked through punch, die, and stripper design in a way that actually mirrors how tools get built, not just how they look on screen. One useful crossover was applying the same logic to aerospace aluminum brackets, where blanking and forming accuracy directly affects downstream machining. Working through assembly constraints in CATIA and managing clearances between punch and die helped connect design intent with manufacturability. A real challenge was getting comfortable with CATIA’s assembly structure and avoiding over-constraining parts, which initially broke updates when dimensions changed. The biggest practical takeaway was learning how to set up parametric part models so minor changes in sheet thickness or profile don’t force a full redraw. That alone saves hours on iterative automotive tool revisions. Overall, it felt grounded in real engineering practice.
Your instructor
Team EveryEng
Engineer
Mechanical Engineering
Is this course for you?
You should take this if
- You work in Manufacturing & Industrial or Automotive
- You're a CAD & Analysis / Manufacturing Engineering professional
- You prefer self-paced learning you can revisit
You should skip if
- You need a different specialisation outside CAD & Analysis
- You need live interaction with an instructor
Course details
Course suitable for
Key topics covered
Course content
The course is readily available, allowing learners to start and complete it at their own pace.
- Guide Bush Design3 min
- Guide Pillar Design3 min
- Bottom Plate Design3 min
- Hole Design in Plate4 min
- Top Plate Design5 min
- Assembly Design8 min
Opportunities that await you!
Skills & tools you'll gain
Career opportunities
Course Attachments
Why people choose EveryEng
Industry-aligned courses, expert training, hands-on learning, recognized certifications, and job opportunities-all in a flexible and supportive environment.


 Aug 29, 2026